

This is Technique #1 from our 100 Techniques Every Home Cook Can Master.
Each technique is broken into three sections: why it works, key steps, and recipes that use it. Learn these recipe building blocks and you'll be set up for a lifetime of cooking success.
Salt is elemental, literally and metaphorically. Knowing how and when to apply salt is fundamental to turning out appetizing food.
The correct use of salt—to add flavor, manage water content, change the texture of food, and more—is a running thread throughout all of our recipes.
There are many ways to season food with salt before, during, and after cooking. Here are some guidelines for employing this technique in your cooking.
Sign up for the Notes from the Test Kitchen newsletter
Our favorite tips and recipes, enjoyed by 2 million+ subscribers!
Always Salt From the Start
Although most recipes advise it, seasoning with salt before cooking is probably the least-understood step of seasoning food.
We do it because salt takes time to do its work. Salt penetrates food slowly when the food is cold, and while the process is faster during cooking, it’s not instantaneous.
Adding salt at the beginning of cooking gives it time to migrate into the food; if you add salt only at the end, it provides merely a superficial coating that immediately smacks your tongue in an overpowering way.
For the most even seasoning and well-rounded flavor, we strongly encourage seasoning food early in the cooking process.
If Possible, Season from 12 Inches Above Your Food
To season most effectively, you need to salt smartly, getting the salt to where it’s going to do its job.
For example, we experimented with seasoning meat from different heights—4 inches, 8 inches, and 12 inches—and learned that sprinkling from a height of 12 inches is not just restaurant-kitchen theatrics. It actually allows for the most even distribution of the salt.


Seasoning food from higher up gives you more even coverage.
The New Essentials Cookbook
Cooking well is about more than just knife skills and finding a favorite lasagna recipe. It’s about knowing when to reach for a nonstick skillet and when not to, why you “reverse sear” thick chops, and what umami really is.
Buy NowStep by Step: How to Season Skin-On Chicken
But what about when what you want to salt isn’t easily accessible?
Consider, for example, skin-on chicken. The skin acts like a raincoat, shielding the meat from outside influences and preventing the salt from penetrating.
We’ve learned that salting chicken under the skin is the most effective method to season the meat before cooking.
Step 1: Separate Skin From Meat

Working with 1 piece at a time, use fingers or handle of spoon to carefully peel skin from meat, leaving it attached. Sprinkle salt evenly over all chicken meat under skin.
Step 2: Poke Holes in Fat Deposits

Lay skin back in place over salted chicken to help it retain moisture. Using metal skewer or paring knife, poke holes in fat deposits in skin to allow fat to render.
Step 3: Roast, Then Sear

Roast chicken until it registers 160 degrees, then sear in skillet until skin is crispy and browned.
Watch us demonstrate this chicken breast-salting technique in this video.
When You Can't Salt, Brine
For really challenging situations, we use liquid as a medium for transfer. Letting food rest in brine is a more extreme example, but even a brief soak in a bit of salty liquid is an effective way to season before cooking.
For example, brining whole carrots in a small amount of salty liquid before grilling them gives the salt the chance to penetrate the carrots’ rigid cell walls, ensuring thorough, even seasoning that salting after cooking can’t provide.
Sign up for the Notes from the Test Kitchen newsletter
Our favorite tips and recipes, enjoyed by 2 million+ subscribers!
Step by Step: How to Season Shell-on Shrimp
Shell-on shrimp is another case where brining is more effective than salting. With shell-on shrimp, you can’t lift up the shells to apply salt directly to the meat, so dissolving the salt first in a little liquid and then tossing everything together ensures that the salt gets under the shells and is able to do its work.
Step 1: Toss Shrimp with Salt and Water

Toss shrimp with salt and small amount of liquid in large bowl and let sit at room temperature to infuse.
Step 2: Pat Dry

Drain shrimp and pat dry with paper towels before cooking.
Step 3: Season Again

At the end of cooking, season again with salt to layer flavor.
Recipes That Use This Technique
Want to test out your newfound knowledge of seasoning? Try it with any of these five recipes.
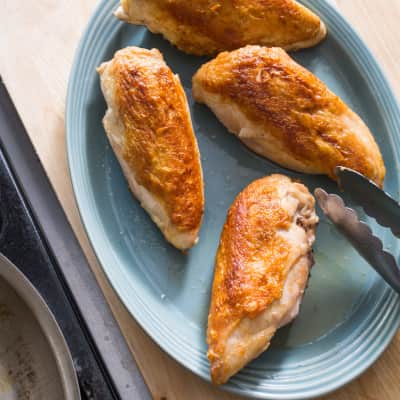
Roasted Bone-In Chicken Breasts
Skin and bones lend chicken breasts exactly what the boneless, skinless variety lacks: flavor and moisture. But how do you cook them? Like steak.
Get the Recipe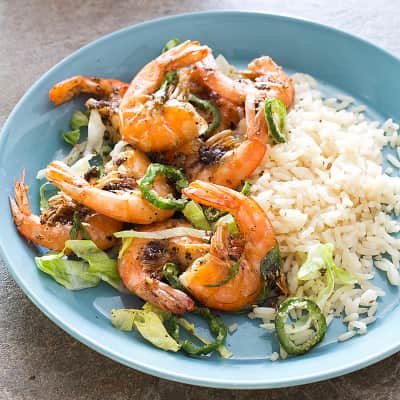
Crispy Salt and Pepper Shrimp
In this peppery dish, the shells are every bit as important (and delicious) as the shrimp.
Get the Recipe
Cast Iron Steaks with Herb Butter
This pan’s unbeatable heat retention should create the deepest, richest sear on a steak. But you first need to know your cast iron.
Get the Recipe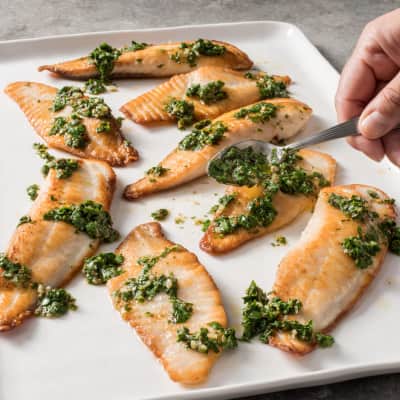
Sautéed Tilapia with Cilantro Chimichurri
We were skeptics, too—until we did our homework. The facts: Most tilapia is responsibly raised and features moist, firm flesh with a clean, mild taste.
Get the Recipe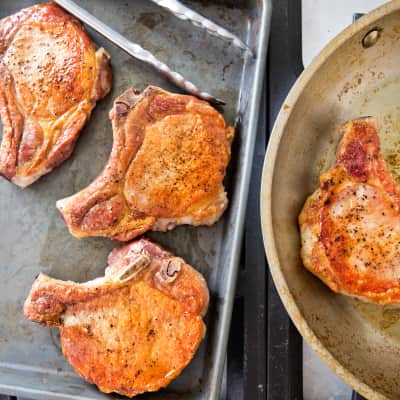
Pan-Seared Thick-Cut Pork Chops
Thick pork chops may boast a juicy interior or a nicely caramelized exterior—but rarely both. We wanted it all, in one recipe.
Get the RecipeReady to learn another technique? Choose from our list of 100 Techniques Every Home Cook Can Master.