

This is Technique #92 from our 100 Techniques Every Home Cook Can Master.
Each technique is broken into three sections: why it works, key steps, and recipes that use it. Learn these recipe building blocks and you'll be set up for a lifetime of cooking success.
If you crave the tang, complexity, and chew of a good homemade sourdough loaf, then it behooves you to make and keep alive a homegrown batch of your own sourdough starter.
Though it may seem intimidating, a starter is simply a culture of yeast and “good” bacteria, and making one is pretty simple, requiring time but little effort.
We've determined a reliable recipe for making and maintaining a starter that anyone can replicate to have delicious, old-word bread at home.
Sign up for the Notes from the Test Kitchen newsletter
Our favorite tips and recipes, enjoyed by 2 million+ subscribers!
The Basis for a Sourdough Starter
You start by stirring together flour and water and letting it ferment for a couple of days at room temperature. Natural yeast and bacteria in the flour wake up and start to multiply, and the mixture evolves into a bubbly blob.
From here, it grows strong through regular “feedings.” After a few weeks, it becomes chock-full of enough yeast and bacteria that a portion of it can leaven and flavor bread.
As long as you keep it healthy and alive, you can use it for years to come.
How to Start Sourdough Starter
We learned in testing that a 50-50 mix of whole-wheat and all-purpose flours works much faster than all-purpose flour alone, because the whole-wheat flour provides more nutrition for the budding organisms.
Using filtered or bottled water is also important, because chlorine in tap water can kill the starter.
The first stage is to make sure the microorganisms are alive and consuming nutrients. At this point, the loose, batter-like mixture smells like sour milk, but it’s a positive sign that the starter is established.
Then feeding begins. Many recipes call for feeding every 12 hours, but every 24 hours is totally sufficient. After about two weeks of feedings, your starter will be pleasantly aromatic and ready for baking.

How to Maintain Sourdough Starter
During the long-term maintenance stage, simply keep your starter healthy through weekly feedings.
Discarding some starter before each feeding gets rid of waste that the microorganisms produce as they consume nutrients—and keeps the starter from taking over your fridge.
It works best to feed the starter and leave it out for a shorter period of time than typically called for: Five hours is just long enough for the culture to dig in but not so long that it consumes all of the food too quickly.
Back in the fridge, your starter continues to feed and grow at a very slow pace, staying healthy all the while.

Everyday Bread
Introducing the only cookbook to make homemade bread baking convenient by letting you choose what to do and when.
Shop NowStep by Step: How to Make and Maintain a Sourdough Starter
If you follow these simple steps you'll be well on your way to having homemade sourdough bread whenever you want.
Step 1: Mix Flour and Water

Mix flour mixture with room-temperature water in glass bowl. Cover with plastic and let sit at room temperature until bubbly and fragrant, 48 to 72 hours.
Step 2: Discard Some Starter

Measure ¼ cup starter and transfer to clean bowl; discard remaining starter. Stir in another portion of flour mixture and room-temperature water. Cover with plastic and let sit at room temperature for 24 hours.
Step 3: Repeat

Repeat step 2 every 24 hoursuntil starter is pleasantly aromatic and doubles in size 8 to 12 hours after being fed, 10 to 14 days. At this point, starter is ready for baking or storing.
Step 4: Turn Starter to Dough

To prepare for baking, measure out ½ cup starter and transfer to clean bowl; discard remaining starter. Stir all-purpose flour and room-temperature water into starter. Cover and let sit at room temperature for 5 hours. Transfer amount needed for recipe to second bowl. Cover and refrigerate for 12 hours to 18 hours. Refrigerate remaining starter.
Step 5: Maintain Stored Starter

Feed stored starter once a week to maintain.
Watch along as Elle Simone Scott walks through our low-maintenance sourdough starter.
Recipes That Use This Technique
When you're ready to start on your homemade sourdough journey, use one of these recipes.

Sourdough Starter
Making a starter requires time but very little effort. And once it’s established, it opens up a whole new universe of homemade breads with sourdough’s trademark tang.
Get the Recipe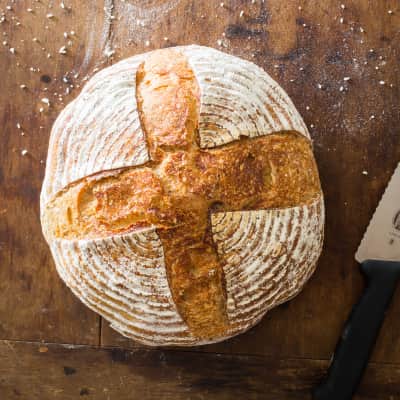
Classic Sourdough Bread (Pain au Levain)
For a classic sourdough bread recipe, we used a mixture of bread flour and whole-wheat flour for complex flavor.
Get the Recipe
Almost No-Knead Sourdough Bread 2.0
For an easy bread recipe that allowed us to put our Sourdough Starter into action, we developed a sourdough version of our Almost No-Knead Bread, which we let rise overnight to develop flavor. For convenience, we let the shaped loaf proof overnight in the refrigerator and bake it straight from the fridge. Baking it in a covered Dutch oven traps steam to provide a crisp, crackling crust.
Get the RecipeReady to learn another technique? Choose from our list of 100 Techniques Every Home Cook Can Master.