The best gas grills are simple and convenient to use. After testing a range of models, we’ve named the Weber Spirit E-325 Gas Grill our winner. Its precise controls and responsive burners let you customize and maintain consistent heat levels. It distributes heat effectively to minimize hotspots, and it has a sturdy cookbox optimized to retain heat, so food cooks evenly. It’s also easy to clean, maintain, transport, and store.

Gas grills offer home cooks convenience and control. The best models are easy to ignite, preheat, and operate. You can adjust the heat levels with the turn of a dial and then enjoy your meal with minimal cleanup. Our favorite models are also versatile: You can cook for one, or a crowd, with recipes like quick weeknight burgers and grilled vegetables; add wood chips to smoke salmon fillets or ribs; or even grill-roast your Thanksgiving turkey.


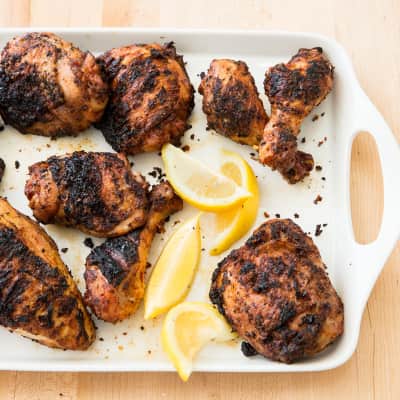
Gas grills are convenient; they require minimal work to start cooking and are simple to operate and clean. This makes them perfect for grilling all sorts of dishes, from quick-charred vegetables to beautifully lacquered chicken and beyond.
Gas grills are often scorned by fans of grilling with charcoal, which burns hotter—and, many believe, imparts more complex, smokier flavor—than gas. Still, few can argue with gas models’ ease of use and convenience, albeit with one caveat: You have to buy a gas grill that works well. In a market teeming with options, what should you look for? To find answers, we harnessed decades of grilling experience to test several popular brands’ newest offerings.
We focused on grills with three or four main burners, a size range we think is best for most people. When we could, we bought them preassembled, which saved us the hassle of assembling so that we could start grilling faster. (Years of building grills for this and other reviews have shown us that DIY assembly is not worth the time and effort involved, especially since many stores offer this service for free). We also chose grills with cast-iron grates (most of them enameled), rather than grates made from stainless steel. Cast-iron grates do a better job retaining heat due to their heft, allowing the superhot grates to sear food beautifully. Enamel also makes cast-iron grates easier to scrape clean and protects them from rust.
How Do Gas Grills Work?
Most gas grills have for decades shared the same basic design, which harnesses the three types of heat transfer—radiation, conduction, and convection—to cook food. The grill’s main compartment is called the cookbox. Near the bottom of the cookbox, gas flows through perforated metal tubes (the burners), which produce a row of flames. Atop the burners sit long strips of metal usually shaped like inverted Vs. These tent-like bars, or heat diffusers, serve a few functions. First, they shield the burners to keep falling food from clogging the holes. Second, when drippings hit the diffusers, the fat and juices combust and vaporize, creating smoke and steam that permeates the food above (they are sometimes called “flavorizers” for this reason). Third, and most important, they absorb heat from the flames and then radiate it toward the cooking surface in the form of electromagnetic waves. Without them, this thermal radiation would travel straight upward and create distinct hot spots directly over each burner. By absorbing and radiating heat upward and outward, the bars are meant to diffuse the heat and help the grill cook more evenly. Perched above the heat diffusers are removable metal grates, which also absorb heat and transfer it directly into food; this direct flow of heat between objects touching one another is known as thermal conduction.

While the diffusers and grates cook food using radiant and conductive heat, respectively, gas grills also rely on a third type of heat transfer: convection, or the flow of heat through fluids (in this case, air). The flames heat the air inside the cookbox, and that hot air rises and transfers heat to the food. When the lid is shut, air cannot escape and instead is displaced downward by the ceaseless rise of more hot air. The air begins to circulate, surrounding and cooking the food from multiple sides. When barbecue and grill-roasting recipes call for leaving a single burner on, positioning food a certain distance away from it, and closing the lid, they’re harnessing the power of convection cooking to gently and slowly cook food, for additional tenderness and flavor development.
What Size Gas Grill Should You Get?
When shopping for a grill, consider the number of burners in the cookbox. We think models with three main burners work best for most people. Grills this size allow you to create distinct heat zones for direct and indirect heat (which is less effective if you have only two burners). Three-burner grills are also spacious enough to fit a whole pork shoulder or burgers for a backyard party without becoming cramped. This usually translates to at least 350 square inches of cooking surface area, which our tests showed can hold 16 or more ⅓-pound burgers.
If you’re working with a small outdoor space or cooking for a smaller household, a three-burner grill will be sufficient. Consider upgrading to a four-burner model if you have more space and plan to cook for a crowd (or grill multiple large cuts of meat) on a regular basis.
Our Editors' Favorite Grilling Recipes
We've developed hundreds of grilling recipes over the years. Here are some of our favorites.
Go to CollectionAre Expensive Gas Grills Worth the Money?
In our experience, gas grills truly embody the adage “you get what you pay for.” Less-expensive models (broadly, those sold for less than about $400) are usually built with lower-quality, less durable materials and will wear out quicker. Slightly pricier models such as our winner (a three-burner model priced at about $500) are typically constructed with higher-quality materials that hold up better to long-term frequent use, especially if you take care to maintain them.
In addition to longevity, more expensive models may offer more burners, extra cooking space, or even additional features such as infrared heating elements or flat-top panels that replace the standard grates. Many grills are outfitted with one or two “searing” burners or zones (either housed in the cookbox or set in the side tables), which are designed to burn hotter. These can be useful for creating a delicious crust on a steak but are not essential for successful grilling. Some grills also sport extra features including supplementary warming racks, storage space, prep surfaces, or accessories such as grill rotisseries. Our advice? Bigger or more isn’t always better. Opt for a reliable, well-designed, moderately priced model—such as our winner—over a grill with lots of flashy (and usually superfluous) frills.

What to Look for
- Sturdy Materials and Construction: Top-performing grills had cookboxes made with thick, solid metal—usually sturdy cast aluminum bases and heavy, double-layered enameled steel lids. Multiple layers of thick metal insulate effectively, retaining heat instead of allowing it to escape. These models’ side tables, cabinets, and wheels were also durable, sustaining minimal damage during testing and indicating they’d hold up for years to come.
- Easy, Fast Ignition: We liked grills that paired each burner with its own igniter, which we activated by turning the corresponding control knob in the same way you turn on burners on a gas stovetop. These burners always ignited quickly and easily on the first try. Grills that relied on separate push-button ignition systems occasionally took two or three attempts and required both hands to light.

- Responsive, Precise Burners: When we adjusted the burners on our winning grill, we immediately saw changes in the size and strength of the flames. The burners not only responded quickly but also showed a clear range of heat output between the lowest and highest settings. This allowed us to cook with distinct heat levels, from true “low” temperatures of less than 300 degrees (great for cooking using indirect heat and smoking) to highs of 650 degrees or more (essential for optimal searing).


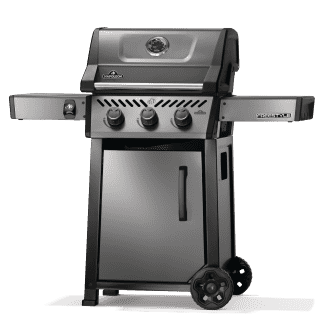
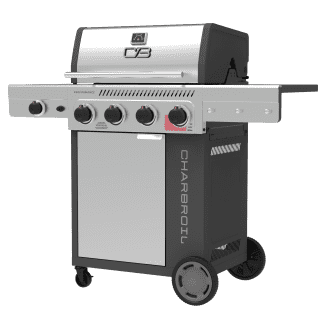
Our winning grill from Weber (left) effectively distributed heat across its entire cooking surface, so burgers and other foods cooked evenly and all were done at the same time. Other grills (right) didn’t distribute heat as well, leading to hotter and cooler areas. Food in the back finished cooking long before food in the front.
- Well-Spaced Heat Diffusers: Our winner’s heat diffusers were positioned 2.5 inches below the grates, the largest amount of clearance in the lineup. This configuration allowed heat to radiate simultaneously outward and upward toward the grates, spreading across their entire surface and minimizing hotspots so that steaks or burgers across the grill cooked at the same rate. These diffusers also had gaps between them, which allowed some grease to drip safely past the burners and collect in the grease tray rather than igniting and causing flare-ups.


We preferred grills with gaps between their heat diffusers (left), which allowed a large portion of grease and drippings to flow safely into the grease traps. Cramped heat diffusers (right) collected more grease, leading to intense, uncontrollable flare-ups.
- A Tight-Fitting Lid That Opens Wide: Our favorite grills had lids that closed tightly, trapping both heat and smoke so that slow-roasted pork loins cooked evenly and absorbed robust, smoky flavor. We also prized lids that opened wide to let smoke flow straight up instead of into our faces.
- A Small Back Vent: Vents are an essential component to any grill; without them there would be no oxygen to fuel the flames and heat wouldn’t circulate properly. Each grill we tested had a single vent that ran the entire width of the back of the cookbox. But cookboxes with smaller vents (measuring less than an inch tall) contained heat and smoke better, which led to less temperature fluctuation and more efficient cooking, especially for longer, lower-heat recipes.


Grills with smaller back vents (left) retained more heat and smoke, creating more effective convection inside their cookboxes and cooking food evenly and efficiently. Those with larger vents (right) lost heat far too quickly and had trouble maintaining ideal cooking temperatures.
- A Removable Cookbox Bottom: Most cookboxes had bottom trays that slid out for easy access; we appreciated how straightforward these components were to remove, clean, and reattach.
- A Large Drip Pan: Grills with larger drip pans contained more grease. We liked that we had to empty these pans less frequently than other grills’ smaller grease traps.
What to Avoid
- Flimsy Materials and Rickety Construction: Grills with cookboxes made of thinner, flimsier metal insulated less effectively. Because so much heat escaped, food cooked slowly and unevenly. The same grills’ side tables, cabinets, and wheels were built using cheaper, less durable materials that sustained more wear throughout testing, revealing a fragility that will only grow with more use.
- Unresponsive, Imprecise Burners: A couple grills’ burners seemed sluggish, taking longer to alter their heat output when we tried to adjust it. This was likely due to less-precise calibration of how much gas they were emitting. For one grill, even the “lowest” heat settings burned hot, producing large, powerful flames that raised ambient grill temperatures beyond 500 degrees—well above the true “low” temperature range needed for low-and-slow barbecuing, for example.

- Cramped Heat Diffusers: Some grills’ diffusers were positioned just half an inch (or less) below the grates. This small gap provided insufficient space for heat to disperse outward as it rose, creating hotspots over the burners. Our method for smoking on a gas grill uses aluminum foil packets filled with moistened wood chips placed directly on the heat diffusers to create smoke. When smoking pork in models without much clearance, we had to wedge packets filled with wood chips and water pans precariously between the diffusers and grates. This produced less smoke and steam, and pork took longer to cook and was less flavorful as a result. One grill’s diffusers joined together to form a continuous slab of metal across the width of the grill. While this design helped heat spread evenly, it also caught and ignited every bit of grease that trickled down. When we grilled fatty burgers it caused intense flare-ups, with flames that leapt close to a foot high and nearly caught our elbows.

- Loose-Fitting, Curved Lids: Lids that closed loosely allowed more heat to escape, which caused food to cook slower and less evenly. Curved lids directed smoke right into our faces, even when fully open—an annoyance that felt avoidable.


Curved lids (left) directed smoke straight into our faces when we opened them. We preferred lids with straight tops that swung open wide (right), allowing smoke to travel upward. We also liked tight-fitting lids that were made from thicker metal (right), which kept heat in.
- Large Back Vents: A couple grills had big back vents; one model’s vent was 3 inches tall. Heat and smoke escaped from these grills at an alarming rate, causing temperatures within the cookbox to fluctuate wildly and food to cook slower and inconsistently.
- Stationary Cookbox Bottoms: One cookbox base was fixed in place. Instead of being able to slide it out for easy cleaning, we had to reach into the depths of the chamber to scrub and rinse it clean, which was a messy and frustrating endeavor.
- Small Drip Pans: Some drip pans were so small that they overflowed from just one burger-grilling session, spilling grease into the grills’ storage cabinets and making a foul-smelling, difficult-to-clean mess.
The Tests
- Track heat output and distribution on low, medium, and high heat settings
- Map heat dispersal using an infrared camera
- Grill hamburgers over direct, high heat
- Grill steaks over direct, high heat
- Smoke pork loins using indirect heat
- Clean grills after each cooking test
- Evaluate cookbox capacity by trying to fit a whole 14-pound turkey with the lid closed
- Maneuver grills into and out of storage over uneven cement pavement, asphalt, gravel, and grass
How We Rated
- Performance: We assessed the grills’ heat output, distribution, and retention and noted the quality of food they produced.
- Ease of Use: We tested how easy it was to connect propane tanks; ignite the burners and control the heat levels; and clean and maintain each grill.
- Durability: We evaluated how well the grills held up to wear and tear over the course of testing.