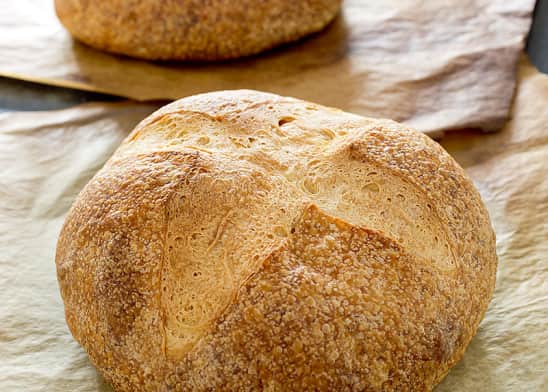
24-Hour Sourdough Bread
By America's Test KitchenPublished on August 22, 2007
Time
1½ hours, plus 13½ to 20½ hours rising and 2 hours cooling
Yield
Makes Two Loaves (1 1/2 pounds each)
Ingredients
Sponge
4 ½ ounces (128 grams) refreshed starter (½ cup)3–4 ounces (85 - 113 grams) bottled water or filtered, (⅜-½ cup), 80 degrees5 ounces (142 grams) unbleached all-purpose flour (1 cup), with 11 to 13 percent protein contentDough
12 ounces (340 grams) bottled water or filtered, (1 ½ cups), 70 degrees24 ounces (680 grams) unbleached all-purpose flour (about 4 ¾ cups) with 11 to 13 percent protein content2 ½ teaspoons table saltBefore You Begin
Once you have a healthy, refreshed starter (see related recipe for "Sourdough Starter Refreshment"), the bread will take about 24 hours (over the course of two days) before it is ready for baking. It is best to start the recipe in the morning, no more than 12 hours after the last feeding of the starter. For the sponge, use the lower amount of water if you live in a humid climate, the higher amount in an arid climate. During kneading, this dough should not exceed a temperature of 80 degrees. If your kitchen is very warm or very cold, use water a few degrees cooler or warmer, respectively. A few pieces of equipment are highly recommended: digital scale, baking stone, parchment paper, instant-read thermometer, and spray bottle filled with water. A baking peel and razor blade are also handy but not essential. The dough can be kneaded by hand, but the kneading times must be doubled. When spritzing the loaves in the oven, be careful to avoid spraying water on the oven light.
Instructions
- In bowl or container with at least 1-quart capacity, use rubber spatula to stir together starter and water until fully combined. Stir in flour until combined; mixture should resemble thick pancake batter. Cover with plastic wrap and let rise at room temperature (about 72 degrees) until doubled in bulk, 2 to 3 hours.
- Measure water into bowl of standing mixer; add sponge to water. Fit mixer with dough hook; with mixer running on lowest speed, add flour 1/2 cup at a time. Once all flour has been added, continue kneading until dough forms ball, about 1 minute longer. Cover bowl with plastic wrap and let dough rest 20 minutes.
- Using fingers, create pocket in rested dough; add salt to pocket. Knead on low speed until dough is soft, smooth, and moist (dough should not be sticky), about 5 minutes. Transfer dough to clean work surface and knead by hand until dough forms firm ball, about 30 seconds.
- Lightly spray container or bowl with at least 4-quart capacity with nonstick cooking spray; place dough in container and lightly spray surface of dough. Take internal temperature of dough; then cover tightly with plastic wrap. If temperature registered below 78 degrees, set container at room temperature (about 70 degrees) in draft-free spot; if warmer than 78 degrees, set container at cool room temperature (about 65 degrees) in draft-free spot. Let stand until dough doubles in bulk, 3 to 5 hours.
- Scrape dough out onto clean work surface. Gently stretch dough (to redistribute and refresh yeast) as far as possible without tearing, then fold it into thirds like a letter.
- Using bench scraper or chef's knife, divide dough in half, each piece weighing about 1 1/2 pounds (680 grams). Form each half into rough ball, cover loosely with plastic wrap or damp kitchen towel, and let rest 15 minutes. To shape dough, use one hand to push dough against unfloured work surface, using other hand as guide. Goal is to make taught ball without ripping surface. Pinch bottom seam and set each round, seam side down, on separate sheets of parchment paper on dinner plates, rimless cookie sheets, or inverted rimmed baking sheets.
- Spray rounds lightly with nonstick cooking spray and cover loosely but completely with plastic wrap. Refrigerate overnight 8 to 12 hours.
- Remove rounds from refrigerator and gently slide onto room-temperature surface where they can rise undisturbed for several hours; space them at least 6 inches apart. Loosen plastic wrap to allow rounds to rise; let rise until at least doubled in bulk and dough barely springs back when poked with your knuckle, 3 to 4 hours. Meanwhile, after about 2 hours, adjust oven rack to lower-middle position, place baking stone on rack, and heat oven to 500 degrees. Working one at a time, carefully slide rounds on parchment onto baking peel, rimless cookie sheet, or inverted rimmed baking sheet. Using sharp razor blade or knife held at 45-degree angle to work surface, slash surface of rounds 1/2 to 3/4 inch deep.
- Working quickly, spray loaves with water, slide onto baking stone, and immediately reduce oven temperature to 450 degrees. During first 5 minutes of baking, spray loaves with water 2 additional times; bake until deep golden brown and instant-read thermometer inserted into center of loaves registers about 210 degrees, about 30 minutes total. Transfer loaves to wire rack, discard parchment, and cool loaves to room temperature on wire rack, about 2 hours.
make the sponge
make the dough
knead the dough
let the dough rise
stretch the dough
divide and shape the dough
refrigerate the rounds overnight
proof and slash the rounds
bake the bread


Time
1½ hours, plus 13½ to 20½ hours rising and 2 hours coolingYield
Makes Two Loaves (1 1/2 pounds each)Ingredients
Sponge
Dough
Test Kitchen Techniques
Ingredients
Sponge
Dough
Test Kitchen Techniques
Ingredients
Sponge
Dough
Test Kitchen Techniques
Why This Recipe Works
In buying a ready-made starter for our sourdough bread recipe, we produced a flavorful loaf while eliminating the weeks of intense babysitting that cultivating a home starter requires. Turning our attention to the next two time-consuming stages of a sourdough recipe—sponge development and fermentation for the dough—we discovered that the time required for both steps could be reduced from two nights to just one day, again without sacrificing flavor. On a roll, we also tried to finish the third step—proofing the shaped loaves—on the same day, but we determined that they really did need to spend the time overnight in the refrigerator, since the loaves proofed at room temperature didn't achieve the same wonderfully irregular crumb and deep, nutty sourness.


46 Comments