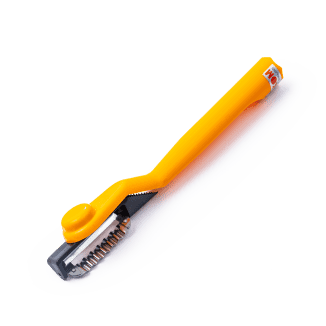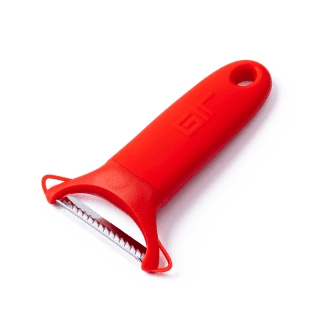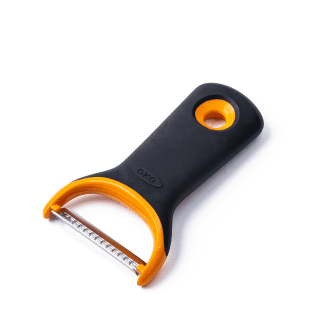

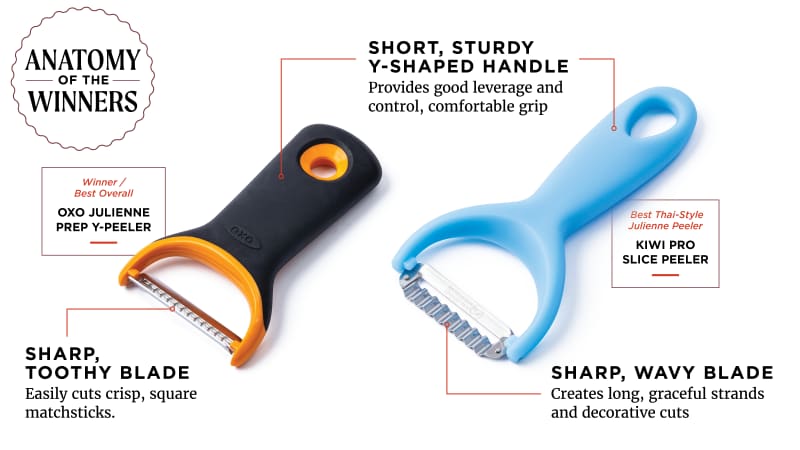
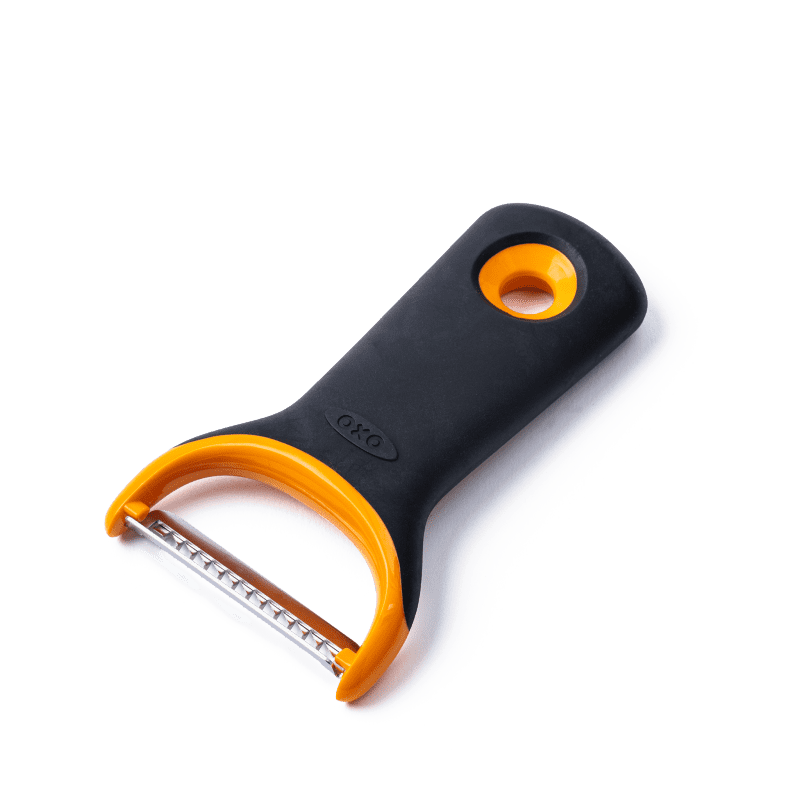
Julienne peelers are simple tools that can be used to cut rectangular strips called matchsticks from any firm vegetable or fruit, such as carrots, zucchini, cucumbers, squash, potatoes, daikon, papaya, beets, apples, and more. Typically you would use a julienne peeler after peeling the food with a vegetable/fruit peeler. After we tested several models, our winner was the OXO Julienne Prep Y-Peeler, which met all our criteria: It quickly and smoothly cut crisp, neat, uniform matchsticks from a variety of produce with maximal ease and minimal waste. We also highly recommend the Kiwi Pro Slice Peeler—made in a style that’s common in Thailand—for its sharp, wavy blades, as well as its sturdiness and comfortable grip. It readily produced elegant, extra-long julienne that didn’t quite have edges that were as crisply squared as the OXO’s matchsticks, but this wasn’t ultimately a detractor. It also made waffle- and wavy-style decorative cuts. The only downside is that its julienne pieces sometimes remained lightly attached lengthwise and had to be gently pulled apart.
The julienne (aka matchstick) cut is a classic knife technique that chefs learn in culinary school. Vegetables and fruits cut this way—in long, slim, uniform, squared-off strips that resemble wooden matches—are perfect for slaws and salads, garnishes, and stir-fries; as vegetable noodles; or for making shoestring potatoes and hash browns. In the test kitchen, we also use julienne cuts in recipes when steaming or baking vegetables with fish en papillote, in Japchae and Javaher Polo, and in the classic Thai green papaya salad called som tam.


In the test kitchen we use julienne vegetables in many different dishes, from left to right, including fish en papillote, Japchae, and Jahaver Polo, fittingly called jeweled rice.
There are a few ways to produce julienne, and a specialty peeler is just one of them. Even if you lack expert knife skills, we have an easy, modified julienne technique for carrots using a chef’s knife. You can also use our winning mandoline, which works beautifully and quickly but is more expensive and somewhat more dangerous and takes more time to set up and clean up. Julienne peelers promise distinct advantages: They’re very inexpensive and compact, work fast, and require no skill. They also take just seconds to clean.
How to Julienne: Pros and Cons
 Winner Chef’s KnifeBuy on Amazon |
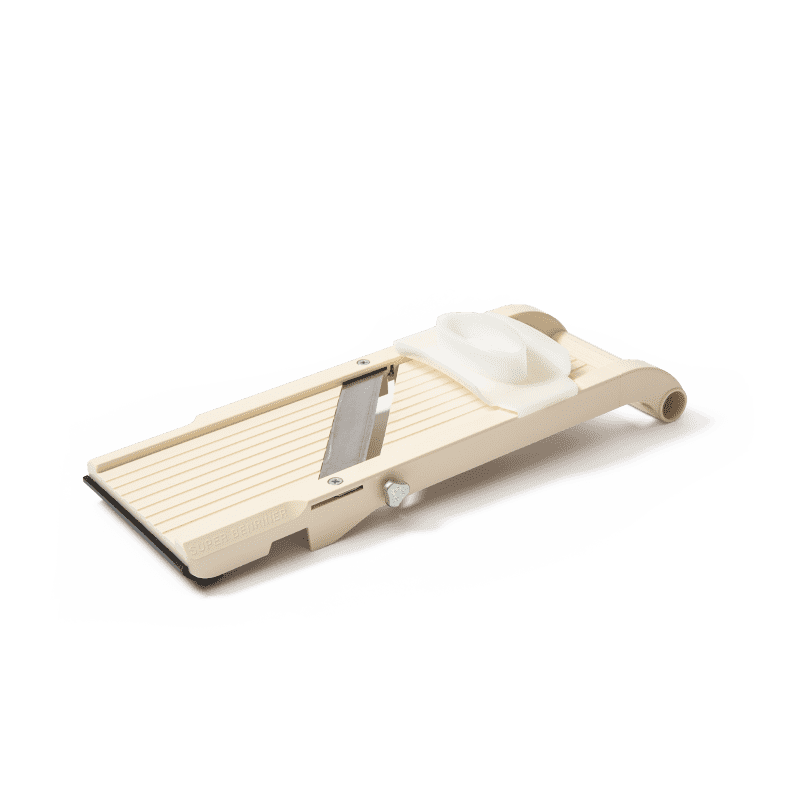 Best Overall MandolineBuy now |
 Winner, Best Overall Julienne PeelerBuy on Amazon | |
|---|---|---|---|
| Pros | Pros No extra gadgets needed | Pros Perfect, crisp, uniform cuts; can do large quantities in a flash | Pros No skill needed; inexpensive; compact; quick to use and clean up |
| Cons | Cons Takes expert skill | Cons Can be dangerous; pricey; need to store device; takes extra setup and cleanup | Cons Slightly slower than mandoline when making large quantities |
How It Works
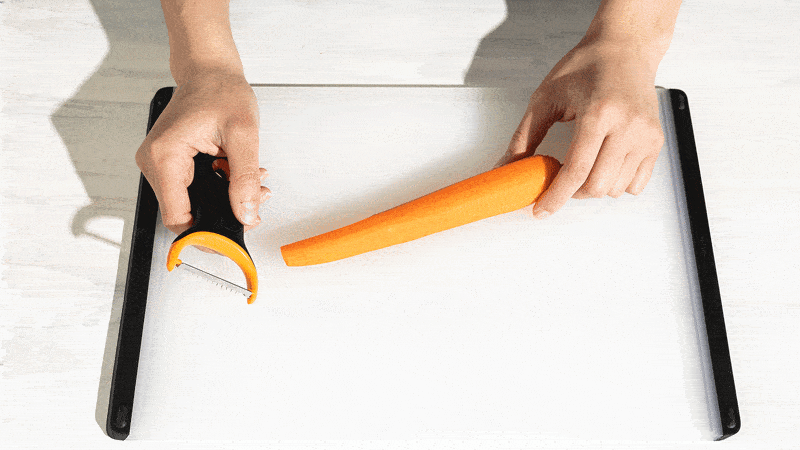
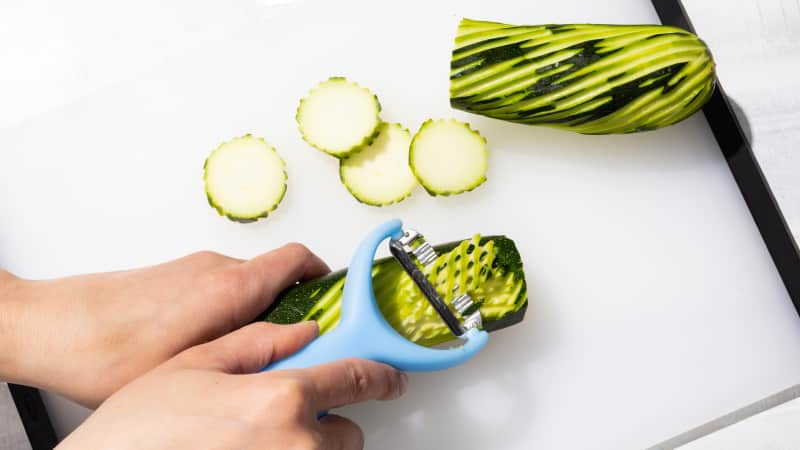
You’ll typically need to peel produce first with a regular vegetable peeler. Then you use the julienne peeler, drawing it along the length of the vegetable to cut long, narrow strips.
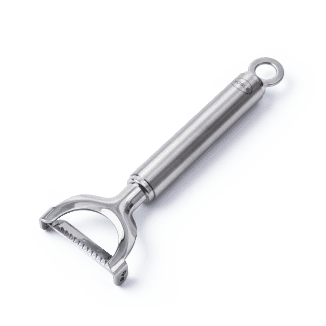
Julienne peelers come in two styles; we tested both. Most models are Y-shaped, with dual blades like a typical vegetable peeler, where the first blade travels over food and determines the depth of the peeling cut made by the second blade. There’s a key difference with a julienne peeler: In the United States, typical models have a second blade composed of a complicated series of folded metal points that resemble sharks’ teeth, which cut food into strips. Thailand has its own form of julienne peeler. Originally designed for cutting green papaya into long, slim strips for the popular salad som tam, the peeler’s second blade has a wavy zigzag shape. Thai julienne peelers also can be used to carve decorative surfaces on foods and to make waffle cuts.


Our favorite julienne peeler, left, has a sharp blade composed of a complicated series of folded metal points that resemble sharks’ teeth, which cut food into strips. Our favorite Thai-style julienne peeler, right, has a blade with a wavy zigzag shape instead. This cuts food in long strips but also can be used to carve decorative surfaces on foods and to make waffle cuts.
What to Look For
- Sharp Blades: There’s no substitute for sharpness in a peeler. Sharp blades make safer tools: They bite in exactly where you want them and don’t skid off to cut you. You also don’t have to force them through food. Instead, sharp blades glide, producing piles of crisply cut vegetables or fruit with little bruising or escaped juice. They also leave less wasted food as the produce becomes smaller and harder to shave; they’re able to dig in when conditions aren’t ideal.
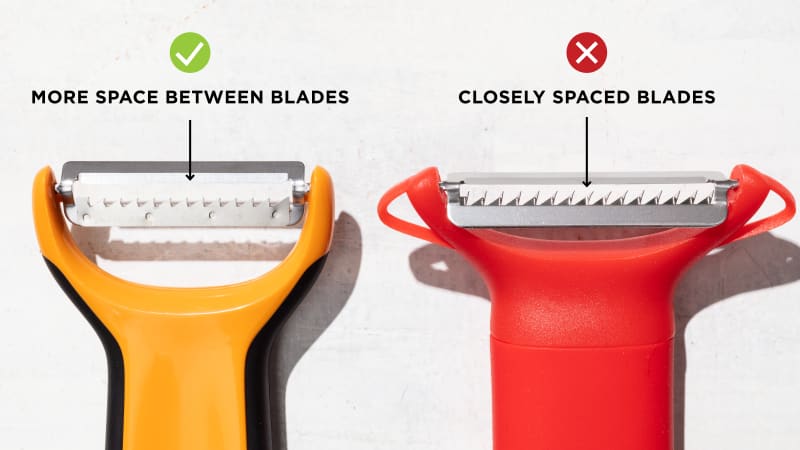
- More Space Between Blades: Peelers with more space between the pair of blades performed better. They trapped less food in their teeth and cut thicker, more symmetrical squared-off matchsticks instead of thin, flat noodle shapes.
- Short, Comfortable Handles: The best models kept our hands close to the action for better leverage as we worked and felt sturdy and comfortable.
- Wide Head with Longer Blades: Broader spans of blades meant we could get more food in each swipe, making the work go faster.


Broader spans of blades meant we could get more food in each swipe, making the work go faster.
- Light Weight: As with regular vegetable peelers, lighter tools struck a balance between sturdiness and comfort without fatiguing our hands.
Other Considerations
- Toothy versus Wavy Thai-Style: We chose favorites in both styles, one with a toothy blade and one with a wavy, Thai-style blade. The features each type had in common (see above) were more important than their style differences.
- Decorative Cuts: Thai peelers’ wavy blades opened up opportunities for decorative cutting. By moving the blade across the food in an “x” pattern, it was easy to create lattice shapes and a wave pattern on the surface of food. One model included other garnishing features such as a corer, a zigzag cutter, and a scoring tool for peeling. These features could be a nice plus.
What to Avoid
- Closely Spaced Blades: A few peelers constantly jammed with shreds of food; made pathetically limp, thin matchsticks that resembled seaweed; and were a pain to clean. We realized that these models tended to have a smaller gap between the dual blades than more successful tools. Some models had no gap at all.
- Long Handles: Being too far from the action made us work harder to shave down the food into strips because we lacked leverage to control the peeler comfortably. In addition, while one of the Thai peelers cut well, its long, wandlike, hollow plastic handle felt a bit flimsy and even flexed slightly as we pressed down on the papaya or potato, making us wonder whether it might eventually snap.
- Short Blades: Two peelers had significantly shorter blades than the others; as a result, they took more strokes to cut the food, making them slower and less efficient.
One model had serrations on its first blade, which left grooves on its matchsticks that made them look thinner and droopier than we preferred and left the food bruised and wet.
- Serrated Blades: One model had serrations on its first blade, which left grooves on its matchsticks that made them look thinner and droopier than we preferred and left the food bruised and wet.
The Tests
- Julienne carrots, russet potatoes, zucchini, and green papaya
- Wash peelers by hand after each test
How We Rated
- Performance: We considered the appearance and condition of the julienned foods, looking for crisp, uniform, long, separate matchsticks with little bruising or juicing. Peelers that worked smoothly with less waste were rated most highly.
- Ease of Use: We evaluated how easy and comfortable it felt to julienne a variety of foods of different textures and shapes and whether each tool felt safe and easy to control as we used it.
- Cleanup: We preferred tools that were easier to clean because they held onto few or no shredded bits of food in their blades.