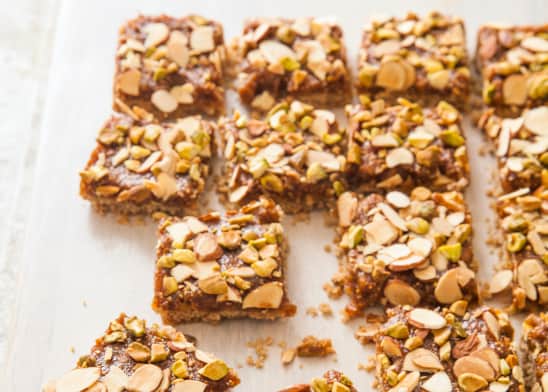
Fig Bars (Reduced Sugar)
By Sara MayerPublished on April 16, 2020
Time
1¼ hours, plus 45 minutes cooling
Yield
Makes 16 bars
Sugar
5 grams (down from 20)
Ingredients
Before You Begin
Do not use dried Black Mission figs in this recipe.
Instructions
- Adjust oven rack to middle position and heat oven to 375 degrees. Make foil sling for 8-inch square baking pan by folding 2 long sheets of aluminum foil so each is 8 inches wide. Lay sheets of foil in pan perpendicular to each other, with extra foil hanging over edges of pan. Push foil into corners and up sides of pan, smoothing foil flush to pan. Grease foil.
- Pulse flour, allspice, salt, and baking powder in food processor until combined, about 3 pulses. Scatter chilled butter over top and pulse until mixture resembles wet sand, about 10 pulses. Add 3 tablespoons apple juice and pulse until dough comes together, about 8 pulses.
- Transfer mixture to prepared pan and press into even layer with bottom of dry measuring cup. Bake crust until golden brown, 35 to 40 minutes, rotating pan halfway through baking. Let crust cool completely in pan, about 45 minutes.
- Microwave figs and remaining ½ cup apple juice in covered bowl until slightly softened, about 2 minutes. Puree fig mixture in now-empty food processor until smooth, about 15 seconds. Spread fig mixture evenly over cooled crust, then sprinkle with almonds and pistachios, pressing to adhere. Using foil overhang, lift bars from pan and transfer to cutting board. Cut into squares and serve.


Time
1¼ hours, plus 45 minutes coolingYield
Makes 16 barsSugar
5 grams (down from 20)Ingredients
Ingredients
Ingredients
Why This Recipe Works
The filling was simple: We hydrated the figs (soft, sweet Turkish or Calimyrna figs worked best) with a little no-sugar-added apple juice and then pureed the mixture to create a jammy, ultraflavorful fig filling. But we ran into problems with the crust. We wanted a shortbread-like crust and topping that would provide balanced, buttery flavor and nice textural contrast. But with no sugar at all, the crust tasted floury and flat and the texture was far too soft. We first tried incorporating some of the pureed fig mixture into the crust for sweetness, but found it only made the base mushy. The simplest solution turned out to be the best one: We used a bit of the no-sugar-added apple juice to impart a slight sweetness and give us the shortbread texture we were after. Baking the crust on its own ensured a flaky texture; once it cooled, all we had to do was spread the fig filling over the crust. A simple sprinkling of toasted nuts on top gave us the extra crunch we craved.


5 Comments