Cultured Butter
By Paul AdamsPublished on January 24, 2017
Time
20 minutes, plus 24 hours resting and 25 minutes chilling
Yield
About 2 cups butter; about 2 cups (450 grams) buttermilk

Ingredients
Before You Begin
Milk and cream are subjected to heat treatment to kill the bacteria that would otherwise thrive in their nutrient-rich environments. According to the International Dairy Foods Association, cream labeled “pasteurized” is generally heated and held at 161°F for 15 seconds. Increasingly common is a method called ultrapasteurization, in which the cream is held at 275°F or higher for just 1 or 2 seconds. This results in a longer shelf life, but in our experience the butter it makes is not quite as flavorful as butter made with regular pasteurized cream, possibly because the culturing bacteria find ultrapasteurized cream a less hospitable place to work their charms.
The ideal temperature range for churning butter is 55 to 60 degrees F/10 to 15.5 degrees C. At colder temperatures, the fat is too firm, and the thick cream just sticks to the sides of the food processor bowl instead of churning with the blades. At warmer temperatures, too much of the fat is liquid instead of crystallized, which results in a greasier final product. In step 2, you can chill the cream in the refrigerator or over an ice bath. You can also refrigerate the cultured cream for several days if that's convenient; just be sure to cover it tightly to keep odors out. When you're ready to turn it into butter, take the mixture out of the refrigerator and, if necessary, let it warm to 55 to 60 degrees F/10 to 15.5 degrees C.
Cream aged for one day will make a sweetish butter with just a hint of tang. As the aging process continues—especially at warmer room temperatures—the cream gets more and more pungent. After a week it may smell almost too strong for some tastes, but most of what you smell resides in the liquid portion that gets separated out, leaving the butter surprisingly mellow. Homemade cultured butter also makes incredible browned butter. Try it on your next pasta dish.
Instructions
- Combine cream and buttermilk in clean lidded container. Cover container or close carton and let sit at room temperature until mixture smells tangy and buttery and has a thick consistency, at least 24 hours or—our recommendation—up to 1 week in cooler seasons, checking daily.
- Chill cream to 55 to 60 degrees F/10 to 15.5 degrees C.
- Transfer cream to food processor and process until mixture turns from grainy whipped cream to lumps of butter splashing in liquid, 1 to 3 minutes. Stop processor immediately.
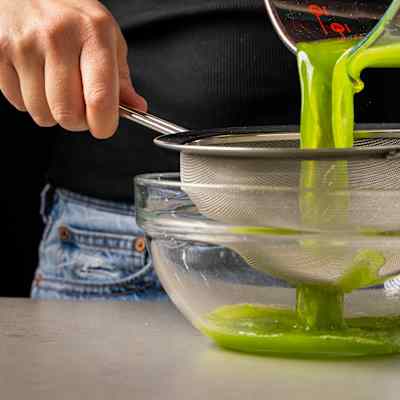
- Fill medium bowl halfway with ice and water. Line fine-mesh strainer with triple layer of cheesecloth, leaving few inches of cloth hanging over sides of strainer. Pour butter mixture through cheesecloth-lined strainer into large bowl (buttermilk will collect in bowl). Lift cheesecloth by edges and twist and squeeze tightly over strainer to press out more buttermilk (when butter starts to squeeze through cheesecloth, you are done). Transfer cheesecloth-wrapped butter to ice bath until firm around exterior, about 2 minutes. Transfer buttermilk to airtight container; do not wash bowl.
- Remove butter from cheesecloth and transfer to now-empty bowl. Stir and press with wooden spoon (a metal utensil will conduct heat from your hands and make the butter soft) to force out additional buttermilk from butter, 1 to 2 minutes. Drain this buttermilk from bowl, add to buttermilk container, and refrigerate until ready to use. If making salted butter, knead salt into butter with wooden spoon. Transfer butter to separate airtight container and refrigerate until ready to use. (Butter can be refrigerated for up to 2 months.)


Time
20 minutes, plus 24 hours resting and 25 minutes chillingYield
About 2 cups butter; about 2 cups (450 grams) buttermilkIngredients
Ingredients
Ingredients
Why This Recipe Works
With the help of friendly bacteria, you can make rich, tangy homemade butter that’s a lot more interesting than the store-bought sticks. All it takes is cream, a little starter culture, and time. If you live in pasture country and can get fresh, grass-fed cream straight from a nearby farm, you’re in great shape. (Note that there are dangers associated with unpasteurized milk, especially for immunocompromised people.) High-quality, flavorful cream makes the best butter, no question, even without culturing it.
We highly suggest you seek out some of the good stuff for this recipe. But if you don’t have a cow, don’t have a cow! Regular supermarket heavy cream is much improved when you patiently culture it. In our testing, we tried both pasteurized and ultrapasteurized heavy cream, which are treated differently before packaging. We also tested a cream that contained ingredients intended to make it stay foamed longer when it’s whipped. The best batches were made with pasteurized (rather than ultrapasteurized) cream free of stabilizers.
The most exciting results, the ones that were truly distinctive and unlike butters you can buy, came from letting the culturing process continue a full week. The flavors that developed were strong and complex, bordering on funky and cheesy.
Last but definitely not least, when you make cultured butter, you get buttermilk! Plenty of it, with the same nuanced tang as the butter—perfect for making biscuits or marinades or even for drinking as a refreshing fermented treat. Diane St. Clair, whose butter farm we visited, wrote a whole book about cooking with buttermilk. Just be sure to save a couple of tablespoons of it to culture your next batch of butter.


68 Comments