
 Buy at ThermoWorks
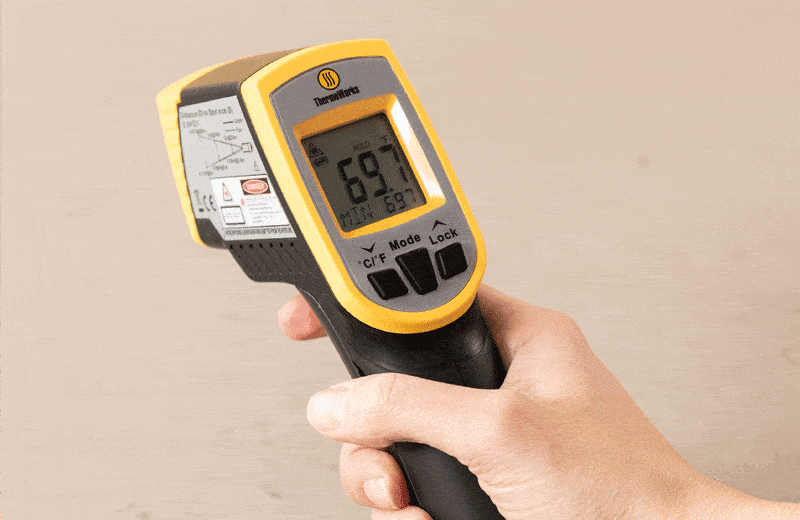
The best infrared thermometers are accurate under controlled conditions, easy to set, and comfortable to hold. They allow you to adjust for different emissivity values, have high distance-to-spot ratios, and provide highly visible laser guides. Our favorite is the ThermoWorks Industrial IR with Circle Laser, which ticked all these boxes. We also recommend the Etekcity Infrared Thermometer Laser Grip 1022 as our Best Buy. It has a slightly undersized handle and a simpler laser guide, and it’s not quite as accurate as our favorite, but it'll still give you useful, reliable ballpark temperatures. And at a third of our winner’s price, it’s a very respectable no-frills option.

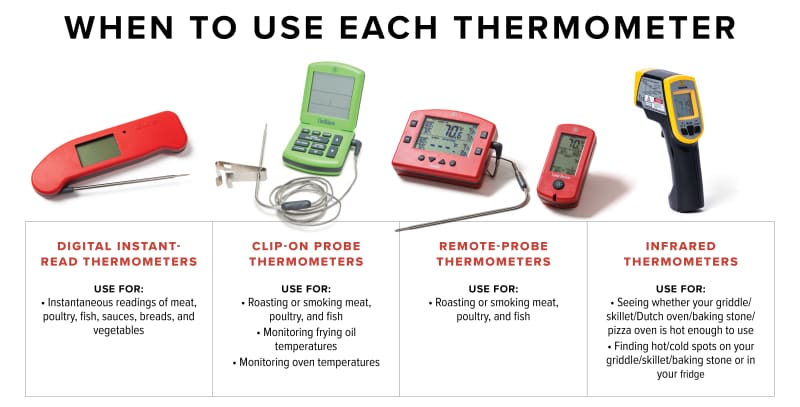
Infrared thermometers give you the surface temperature of any object quickly and can do so from relatively far away without making contact with the object itself. They’ve long been used in industrial scenarios to help find hot or cold spots that indicate problems in machinery, ducts, plumbing, or other building systems. In recent years, they’ve become more common in commercial kitchens as well. We were curious to find out whether they were useful for home cooks, so we bought a range of models and put them to the test.
We were intrigued by what we found. A few things to note: Because infrared thermometers measure surface temperature, not internal or air temperatures, they can’t tell you whether your steak is done (you’ll need an instant-read or meat thermometer for that) or whether your oven has preheated sufficiently (you’ll need an oven thermometer for that).
More critically, they don’t always report temperatures as accurately as an instant-read thermometer does—in our tests, even the most accurate models sometimes gave temperature readouts that were off by as much as 100 degrees. This is not necessarily the fault of the thermometer. Under controlled conditions, many infrared thermometers are perfectly capable of being accurate. But in real life, the thermometers are sensitive to a host of factors that can interfere with their ability to measure temperatures correctly. These can include the angle at which you use the thermometer, the shininess of the object whose temperature you’re measuring, the humidity/clarity of the surrounding air, and the temperature of the thermometer itself during use.
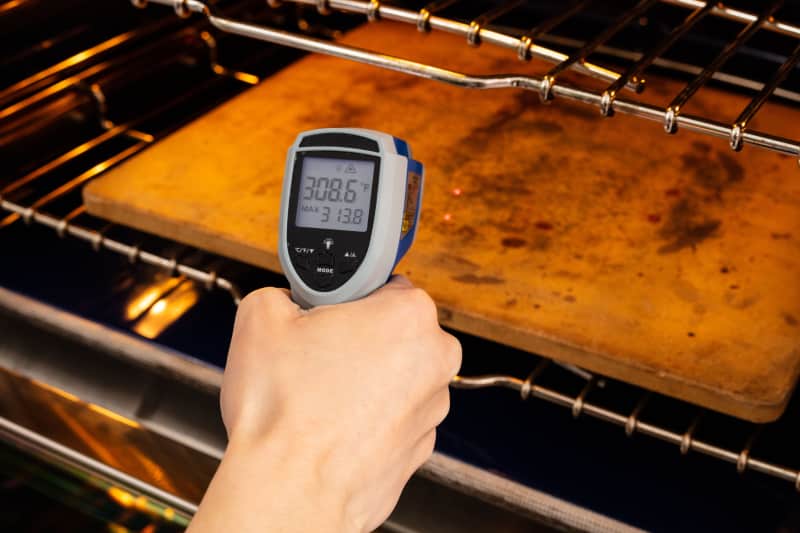
There are measures you can take to ensure more accurate results (see “What’s the best way to use my infrared thermometer?”). However, it’s best not to think of infrared thermometers as tools of absolute measurement that will give you the exact surface temperature of the object. Instead, consider them tools that give you ballpark temperatures. These ballpark temperatures can still be incredibly useful, especially in situations where you can’t get that information any other way—we’ve found them particularly helpful for getting the temperature of outdoor pizza ovens, for example. They’re also great for scenarios where specific temperatures don’t necessarily matter but temperature differences do, allowing you to quickly scan your refrigerator or freezer for warm spots or to check several areas of your griddle or flat-top grill to see if it’s preheated evenly. More generally, they’re good for learning the surface temperature of anything you might cook or bake on: They can tell you the temperature at which your skillet sears steak best, your griddle makes the perfect pancakes, or your bread oven or baking stone gives your bread the most well-blistered crust. These temperatures will be specific to your cookware, and they may not be exactly accurate—your thermometer may report 408 degrees when your skillet is actually 425. But the best infrared thermometers will report the same temperatures every time you cook, giving you a solid benchmark to shoot for and helping you get consistent results.
What to Look For
- Accuracy: While we expect some error from infrared thermometers due to the imperfect conditions in which they’re used, we still want a model that’s as accurate as possible. The best infrared thermometers were accurate within 3.1 degrees of the true temperature under controlled conditions.
- Adjustable Emissivity: Infrared thermometers work by measuring the energy radiating from an object’s surface, which they then convert into a temperature reading. The amount of energy radiated by any object is governed by something called emissivity, which is measured on a scale from 0 to 1. Many infrared thermometers let you adjust their settings to account for the specific emissivity of the object whose temperature you’re taking. We found that this led to much more accurate readouts than those we got from models with fixed emissivity, which assume that every object has an emissivity of 0.95. (You can find the emissivity values of common cookware materials online.)
- A Big Distance-to-Spot Ratio: The distance-to-spot (DTS) ratio tells you how big the “spot”—the area you’re measuring—is relative to your distance from the object. A thermometer with an 8:1 DTS ratio, for example, lets you measure temperatures within a 1-inch-diameter circle from a 8-inch distance. Larger ratios are better, as they let you pinpoint the temperatures of specific areas more accurately from longer distances—an advantage when you don’t want to get too close to your blazing-hot pizza oven. In our price range, DTS ratios of 10 to 1 or 12 to 1 are most common; we preferred those with 12:1 ratios, as they gave us a little more distance from our target. (Thermometers with higher ratios exist but cost significantly more.)

- A Large, Highly Visible Laser Guide: The laser (or lasers) included with most infrared thermometers isn’t actually responsible for taking temperatures. Rather, it’s there to show you where you’re aiming. Most infrared thermometers have either one or two lasers. These were fine, but our favorite model had a laser bull’s-eye—a circle with a dot inside—that made it especially easy to see where we were pointing the thermometer, even in bright daylight.
- An Easy-to-Use Interface: We preferred models with large, easy-to-push buttons and interfaces that made it simple to change settings (e.g., to toggle between Celsius and Fahrenheit or to adjust the emissivity value).
- A Comfortable, Medium-Length Handle: The best models had handles that were neither too short nor too long and neither too thick nor too narrow, so they could be comfortably held by hands of different sizes.

How To Use Your Infrared Thermometer
Want the most accurate results from your infrared thermometer? Here are some tips.
read moreWhat to Avoid
- Inaccuracy: One model wasn’t very accurate even under controlled conditions, and it got worse as testing progressed.
- Fixed Emissivity: Thermometers with fixed emissivity assume that every object has an emissivity value of 0.95. Their readouts were much less accurate as a result when measuring the temperatures of items with lower values.
The Tests
- Evaluate each thermometer’s accuracy at different temperatures (0 degrees, 68 degrees, and 300 degrees Fahrenheit)
- Use each thermometer to take the temperatures of cast-iron and stainless-steel cookware at different heat levels (68 degrees, 310 degrees, 450 degrees, and 1050 degrees Fahrenheit), adjusting the emissivity value and evaluating the accuracy using a type K thermocouple
- Have testers of different hand sizes evaluate ease of use
How We Rated
- Accuracy: We rated the models on how accurate they were under controlled conditions (materials of known emissivity evaluated at a 90-degree angle).
- Ease of Use: We evaluated how easily we could change settings, turn on backlights and lasers, and view the laser guide itself.
- Comfort: We rated the models on how comfortable they were for hands of different sizes to hold.